onsdag 28 oktober 2015

Happy Halloween

FINALY I have some uppdate to my blogg. I know it was a long time since I did anything and posted it here but time isn´t always on my side.

Well, today I will show you this mask I did for halloween. It was white and borring from the begining so I wanted to give it another look.
I think masks like this is perfekt if you´r going to a halloween party and don´t want to use a lot of makeup or spend a lot of money buying a costume.


Here is the statch I started with. I just some things I hade at home and I bought some things, like the pearls. As you can see I have already colored my mask black.


I added some rhinestones in the midle of my mask and I chose just to have the bling bling around one eye to give it a bit more of dramatic effect. Stickles is a glitter glue that is so easy to use .


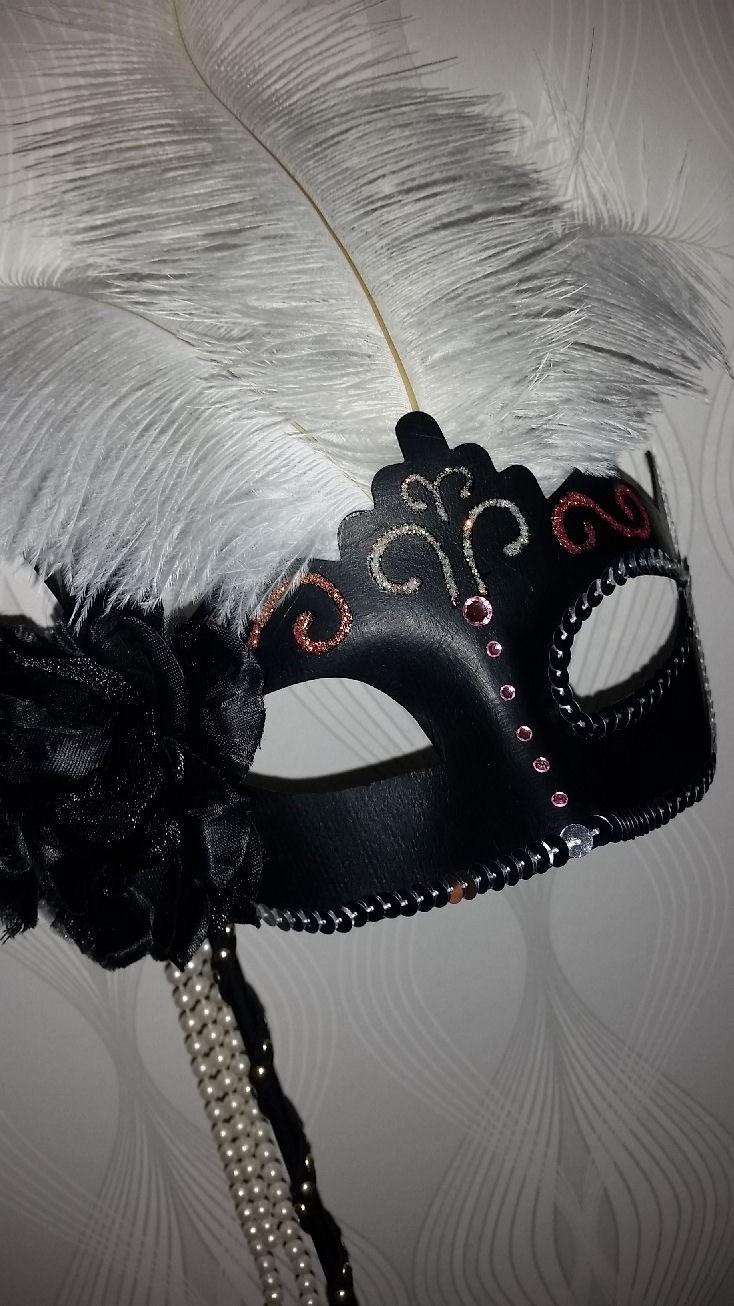
Here is the finished resault of my mask. I added some feathers on top and a flower on the sid. This mask is suposed to be attatched to my head with a band in the back but I just cut it of and used a long stick insteed. Of course I decorated it a bit also.

I wish you all a Happy Halloween and don´t eat to much candy.

And as always, please leave me a comment and let me know what you think of it. 


söndag 19 juli 2015

Small giftbox

Gift box


A while ago I bought this die that is used for making a small box. I havn´t tryed it before so I thought it was time to give it a go. I really didn´t have any idea of how big the box was going to be or how I should make it but that´s the fun part about crafting, :)

Anyway. It´s nothing special about the inside of the box really so I just made it in pink cardstock. The outside I wanted to make it in a steampunk theme because that is the theme I like the best. So after cuting it out I took some cogwheels on it and some pipes.


I cover it all up with alumium tejp and painted it with black acrylic and then just whiped of the extra colour. I´m sorry about the quality about the light but it was dark and hard to make it good with the flash. As you can see I just decorated the sides and the top part of the box and I also put in some screws and a small flower.
When everything had dryed up I glued it together and it was done. 


I hope you liked it and that you got some inspiration from it. And as always, it´s always fun to read you comments.

Happy crafting. 


torsdag 4 juni 2015

Birthday contest 

This is my entry in a contest for En Liten Butik. The challenge was to be inspired by a sketch, and to create something for a birthday. It had to be something turquoise and something with glitter in it and this is what I came up with.


The base is embossed on white cardstock and then coloured with Inka Gold. 


The buttefly is made with a die and then I used some glitter embossing poweder on it. 


It´s really hard to the the light to show how much it glitters so I hade to turn the flash on to get some pictures. Both the background, the Grattis and the butterfly has a lot of glitter in them.


When I look at this I can see that it´s not like the sketch but it did inspire me to do this layout. The colour, the theme and the squares is what I got from it, just in case anyone wounder :)

So lets hope I get lucky and win. :)

Happy crafting.


onsdag 27 maj 2015

Gift box

Gift box

When I started this I wasn´t quite sure of how I wanted it to be or what I was going to use it for but I must say that I am really happy with the resault.
This box I will give away and I will just fold some money to put in it. I think it is about 10 cm x 10 cm so it´s not that big. 


I used this nice paper I bought and of course I thought of staming it a bit after I already had put it on the box. Well well, it turned out good anyway but I need to think of doing all the stamping first the next time. 


I used wallnut stain on the edges and then I decorated it with some  flowers from Prima Marketing and my new die from Magnolia. The more I´m using products from Prima Marketing, the more I´m falling in love with them.


This is how the back looks like on the box with the staming. I just did it randomly and just put some here and there. :)


The butterfly I used some old paper I found with a lot of colours on it.


I hope you liked this box and that it gave you some inspiration. If there is anything you woundering just ask by leaving a comment or sending me a mail.

Happy crafting. 


onsdag 20 maj 2015

Tin recycle

Recycle

Well we all know how important it is to recycle everything and here I will show you what I did with a tin of ravioli. 


On the top you can see the material I used for this. The tin is cleand of course or it would start to smell hehe. 
I just put on everything that I wanted on it just random until I feelt nothing more would fit. .

When I have everyting that I want on my tin I started to cover everything with alunium tejp. Just like I have done on my other projects. Then it´s just the paint job and putting in the plant  and now I have a really cool tin insteed :) 

I hope you got some inspiration from this and please let me know what you think.

Happy crafting. 


torsdag 7 maj 2015

Card making time

Well I´m not that much into making cards but I have to addmit that it is pretty fun to do, sometimes.
Since I am new to this I don´t know what style I like yet so I´m testing and seeing what I like. And the reason why I wanted to show this card is because I want to show that everyone has to start somewhere. Not everyone can make all this nice cards thats for sale on FaceBook and other sites. We all have to learn and this is where I´m starting :)


For this card I used an image on an angel and for the background I used some stencils from Tim Holtz with distress ink. I have always loved blue so of course I use blue for my first project. I think it turned out pretty good for beeing my first try ever on a card. 

This is how it looks like when I was trying out to see how I wanted the flowers to be placed.


I finaly decided to have them like this and I think it was a good choise.


This is the finished card.


I hope you liked it and that it gave you some inspiration on how to make and easy and nice card.

Happy crafting all. 


söndag 26 april 2015


I was on YouTube the other day and this guy made this awsome hat and I just knew I hade to try it out and this is the resault. This was really easy to do and I will absolutly do more then this one.


First I hade to make a pettern and this hat is made out of foam. It took me a while before I got it right and this is how one of the pices looked like. On the big round I also needed to cut out the center or it would be hard to wear it. I chose to have eight sides on my hat so I needed two sheets of foam.


After all the pices was cut out I startd to make the hat by gluing the eight pices together and I got something that looked like this.


When the glue was dry I put on the top and the bottom of the hat.


Just added some different decorations, also made out of foam but of course you can use pretty much anything you like and prefeer .


Since I wanted my hat to be dark I painted it all black as a bas.


And when all the black pain was dry I added some brown and some silver to get that effect that I wanted and then when it was dry I was done. 


I hope you liked this and please let me know what you think about it and if you try it out yourself, let me see how it turned out.

Happy crafting all. 


onsdag 8 april 2015

Challange time. :)

I thought I would enter a challenge and this is something that I never do usualy but I´m starting to feel more and more confortable with my crafting so I thought I would give it a try.

I decided to make a PL card for my album and I have have chose third row Stickles to Brads on the bingo card and this is how my card turned out. 

If you want to enter the challenge you can press here.

I used stickles around the picture and then I used two different dies to get the title with two different fonts. Then for the colour I used Distress Ink both for the fonts and on the stars. The swirl on the right is embossed with my new embossing powder ( wich I love btw. ). And finaly I used sunglasses brads to complete my card.


I hope this will give you some inspiration and now lets hope I win the challange with my card.

Happy crafting.